The Homemade Face Mask That Made My Skin Glow
Imagine your skin as a canvas, waiting for the perfect blend of colors to bring it to life. You might be surprised to learn that simple, natural ingredients can create a mask that transforms dull skin into a radiant masterpiece. With just a few items from your kitchen, you can unlock a glow you didn’t think was possible. Curious about how to mix these ingredients for stunning results? Let’s explore the process together.
Key Takeaways
- Combine natural ingredients like honey, yogurt, and lemon juice to create a glowing face mask rich in antioxidants and vitamins.
- Apply the mask evenly on a cleansed face for enhanced absorption and radiant results.
- Leave the mask on for 15-20 minutes before rinsing off with warm water for rejuvenated skin.
- Use quality, fresh ingredients to maximize the mask’s effectiveness and nourish your skin.
- Incorporate the mask into your weekly routine for consistent improvements in skin clarity and glow.
The Benefits of Natural Ingredients for Your Skin
Have you ever wondered why so many people are turning to natural ingredients for their skincare routines? You’re not alone—these ingredients offer incredible benefits for your skin.
Embracing a glowing skin DIY mask can transform your complexion without harsh chemicals. Natural components nourish and hydrate your skin, promoting a radiant glow while minimizing irritation.
They’re packed with antioxidants, vitamins, and minerals that enhance your skin’s health and vitality. Additionally, using a simple DIY face mask can significantly improve your skin clarity in just one week.
Plus, crafting your own mask lets you customize it to suit your unique skin type.
Key Ingredients You’ll Need
Creating your own homemade face mask is an exciting adventure, and choosing the right ingredients is essential for achieving the best results.
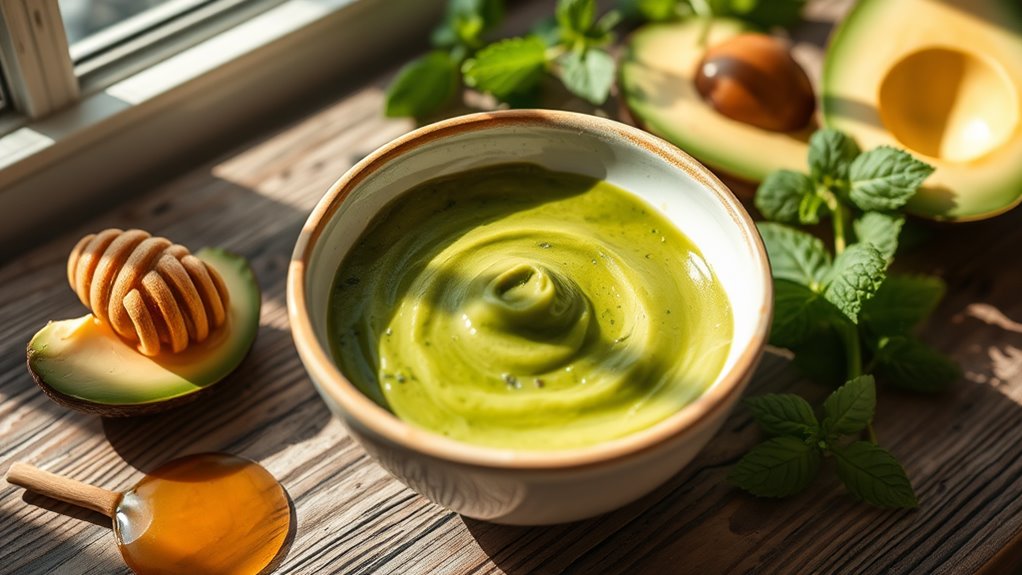
Start with honey, a natural humectant that hydrates and soothes your skin. Next, add yogurt, which contains lactic acid to gently exfoliate and brighten your complexion. For a nourishing boost, include mashed avocado, rich in vitamins and healthy fats. Don’t forget a squeeze of lemon juice to help even out skin tone. Lastly, consider adding oats for their calming properties and gentle exfoliation.
Incorporating these natural ingredients into your skincare routine can significantly enhance your skin’s appearance. These key ingredients will work together to leave your skin glowing and revitalized. Enjoy the process!
Step-by-Step Instructions to Create the Mask
To whip up your homemade face mask, gather your key ingredients and follow these simple steps. First, mix the base ingredient with your chosen add-ins in a bowl. Stir until you achieve a smooth consistency. Next, transfer the mixture into a clean container for easy application. Additionally, consider incorporating natural ingredients to enhance the benefits for your skin.
| Step | Action | Notes |
|---|---|---|
| Step 1 | Combine ingredients | Ensure they’re fresh |
| Step 2 | Mix until smooth | Use a whisk or fork |
| Step 3 | Store in a container | Keep it airtight |
Now, you’re ready to enjoy the glowing results!
How to Apply the Face Mask Effectively
Before you apply your homemade face mask, make sure your skin is clean and prepped for the best results.
Use an even application technique to ensure every part of your face gets the benefits, and remember to stick to the recommended time duration for maximum effectiveness. A quick and effective DIY anti-aging face mask can rejuvenate your skin and reduce the signs of aging.
Let’s explore how to achieve that perfect application for glowing skin!
Prepare Your Skin
Start by cleansing your face to remove dirt, oil, and makeup, setting the stage for your homemade face mask to work its magic.
Use a gentle cleanser, massaging it into your skin in circular motions, then rinse with warm water.
Pat your face dry with a soft towel—don’t rub, as this can irritate your skin.
Next, consider exfoliating to slough away dead skin cells, revealing a fresh layer underneath.
This step enhances absorption, allowing the mask to penetrate better.
Finish by applying a toner to balance your skin’s pH, prepping it perfectly for that glowing transformation ahead.
Even Application Technique
How can you ensure your face mask covers every inch of your skin evenly?
Start by applying it in sections, working from the center of your face outward.
Use your fingers or a brush for a precise touch.
Here are three tips to help you achieve that flawless application:
- Dab and spread: Gently dab the mask on your skin, then spread it smoothly with upward strokes.
- Focus on contours: Pay special attention to areas like your nose, chin, and forehead.
- Avoid overloading: Use a thin layer; it’ll adhere better and dry evenly.
This way, your skin will thank you!
Recommended Time Duration
Getting the timing right is crucial for maximizing the benefits of your homemade face mask. Too short, and you might not reap the rewards; too long, and it could irritate your skin. Here’s a quick guide to help you nail the perfect duration:
| Mask Type | Recommended Time |
|---|---|
| Hydrating Masks | 10-15 minutes |
| Exfoliating Masks | 5-10 minutes |
| Clay Masks | 10-20 minutes |
| Peel-off Masks | Until dry (20-30 minutes) |
Follow these guidelines, and you’ll enjoy glowing, revitalized skin in no time!
Tips for Maximizing Results
To truly see the benefits of your homemade face mask, stick to a consistent application schedule that works for you.
Prepping your skin beforehand ensures it absorbs all those nourishing ingredients, and always opt for high-quality components to maximize effectiveness. Including a DIY face scrub in your routine can also enhance the glow of your skin by exfoliating away dead cells.
With these simple tips, you’ll transform your skincare routine into a revitalizing experience!
Consistent Application Schedule
Consistently applying your homemade face mask can significantly enhance its effectiveness and transform your skincare routine.
To maximize results, establish a regular schedule that fits seamlessly into your life.
Here are some tips to keep you on track:
- Choose a specific day each week to treat your skin—make it a self-care ritual.
- Set reminders on your phone or calendar to ensure you never skip a session.
- Pair your mask application with another relaxing activity, like reading or listening to music, to make it more enjoyable.
Prepping Your Skin
Before slathering on your homemade face mask, prepare your skin for optimal results.
Start by cleansing your face with a gentle cleanser to remove dirt and impurities.
This step creates a fresh canvas for the mask to work its magic.
Next, exfoliate to slough off dead skin cells, enhancing absorption and promoting a radiant glow.
Don’t forget to steam your face for a few minutes; this opens your pores and allows deeper penetration of nutrients.
Finally, pat your skin dry and consider applying a light toner to balance your skin’s pH.
Now, you’re all set for a glowing transformation!
Choosing Quality Ingredients
Selecting quality ingredients is crucial for crafting an effective homemade face mask that truly delivers results.
To maximize your mask’s benefits, consider these tips:
- Opt for fresh produce: Fruits and veggies packed with vitamins can revitalize your skin.
- Choose organic when possible: Organic ingredients reduce exposure to harmful chemicals, ensuring a purer experience.
- Incorporate natural oils: Oils like coconut or olive nourish and hydrate, enhancing the mask’s overall effectiveness.
My Personal Experience With the Mask
Trying my hand at a homemade face mask was both an exciting and slightly daunting adventure.
As you mix fresh ingredients, the vibrant colors and delightful scents fill the air, sparking your enthusiasm.
Once applied, the cool sensation glides over your skin, instantly refreshing you.
You might notice a tingling feeling—don’t worry, that’s just the mask working its magic!
After about 15 minutes, rinsing it off reveals a radiant complexion.
Your skin feels softer, smoother, and completely rejuvenated.
It’s a simple yet effective way to pamper yourself, and you’ll find yourself looking forward to your next homemade skincare session. Incorporating natural ingredients into your routine can lead to glowing skin and overall skin health.
Incorporating the Mask Into Your Skincare Routine
Integrating your homemade face mask into your skincare routine can elevate your self-care game to new heights.
To make the most of it, consider these simple steps:
- Use it weekly: Apply the mask once a week for optimal results, giving your skin time to breathe in between treatments.
- Prep your skin: Cleanse thoroughly before applying the mask, ensuring your pores are open to absorb all those nourishing ingredients.
- Follow up with moisturizer: After rinsing off the mask, seal in hydration with a good moisturizer to keep your skin glowing and supple.
With these tips, your skin will thank you!