My Favorite Homemade Scrub for Glowing, Smooth Skin
If you’re looking for a simple yet effective way to achieve glowing, smooth skin, you’ve come to the right place. This homemade scrub combines everyday ingredients that not only exfoliate but also nourish your skin deeply. Imagine the refreshing sensation of sugar gently buffing away dead skin cells, while honey and lemon juice work their magic. Curious about how to whip up this rejuvenating treat? Let’s explore the perfect blend of ingredients next.
Key Takeaways
- Combine equal parts of sugar and coconut oil with honey and lemon juice for an effective scrub base that exfoliates and hydrates skin.
- Gently massage the scrub onto damp skin in circular motions for 3-5 minutes, enhancing circulation and promoting a healthy glow.
- Rinse with lukewarm water to remove the scrub, then pat skin dry and apply a moisturizer to seal in hydration.
- Use the scrub once or twice a week, adjusting frequency based on your skin type to avoid irritation.
- Store in an airtight container in a cool, dark place, labeling with the date for optimal freshness and potency.
Ingredients for the Perfect Scrub
Creating the perfect homemade scrub starts with choosing the right ingredients. For a glowing skin scrub, you’ll want to blend exfoliants like sugar or sea salt with nourishing oils such as coconut or olive oil.
These oils hydrate while the exfoliants slough off dead skin cells, revealing a fresh layer beneath. Adding honey boosts moisture and has antibacterial properties, while essential oils like lavender or tea tree can enhance the scent and benefits. Fresh ingredients like coffee grounds or oatmeal can also elevate your scrub’s effectiveness. Additionally, incorporating natural ingredients can enhance your skin’s radiance and overall health. With the right combination, you’ll achieve smooth, radiant skin that feels as good as it looks.
Step-by-Step Preparation
Gather your ingredients and tools to embark on the journey of making your homemade scrub.
Start by measuring equal parts of your chosen exfoliant and moisturizing base—like sugar and coconut oil.
In a mixing bowl, combine them thoroughly until you achieve a smooth, grainy texture.
If you’re using essential oils, add a few drops now for fragrance.
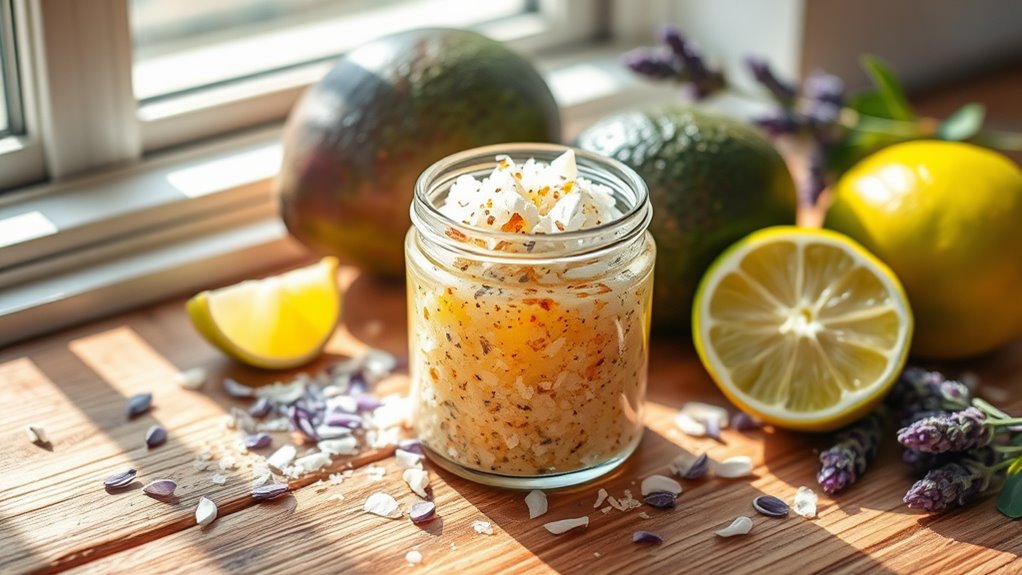
Once mixed, transfer your scrub into a clean jar, sealing it tightly.
Label it with the date, and store it in a cool, dry place.
Now you’re ready to pamper your skin with your delightful creation! Using natural ingredients in your scrub can enhance your skin’s health and appearance, leading to glowing skin.
Enjoy the process and the results!
Benefits of Each Ingredient
Now that you’ve mixed up your homemade scrub, let’s explore the amazing benefits of each ingredient.
You’ll discover how exfoliating properties can reveal fresh, glowing skin while nourishing elements work to hydrate and rejuvenate. Understanding these benefits will help you tailor your scrub to meet your skin’s unique needs. Incorporating DIY skincare into your routine can enhance your skin’s overall health and appearance.
Exfoliating Properties Explained
Have you ever wondered how the right combination of ingredients can transform your skin?
Each element in your homemade scrub serves a purpose, especially when it comes to exfoliation.
Here are three key benefits:
- Sugar: The natural granules gently buff away dead skin cells, revealing a fresh layer beneath.
- Oats: They provide a soothing effect while absorbing excess oil, ensuring your skin feels clean and smooth.
- Honey: This sticky delight acts as a humectant, helping to retain moisture after exfoliation, leaving your skin soft and radiant.
These ingredients work together to unveil your skin’s natural glow!
Nourishing Skin Benefits
Crafting a homemade scrub not only exfoliates but also nourishes your skin with each ingredient’s unique properties.
Take sugar; it gently sloughs off dead cells while providing moisture.
Add coconut oil, and you’ll notice its deep hydration and soothing qualities, perfect for dry skin.
Honey, with its natural antibacterial properties, helps to heal and brighten your complexion.
Finally, consider essential oils like lavender or tea tree for their calming effects and skin-repairing benefits.
Together, these ingredients create a powerhouse of nourishment, leaving your skin not only smooth but also glowing and revitalized.
Embrace this natural goodness for a radiant you!
Application Tips for Best Results
To get the most out of your homemade scrub, start by prepping your skin to ensure it’s clean and ready to absorb all those nourishing benefits.
Use gentle application techniques to massage the scrub in, allowing it to work its magic without irritation. Incorporating proper exfoliation into your routine can greatly enhance your skin’s health and appearance.
After rinsing, don’t forget to moisturize for that ultimate glow and hydration boost!
Prepping Your Skin
Before diving into your homemade scrub, take a moment to prepare your skin for the best results.
Proper prep enhances the effectiveness of your scrub, leaving your skin glowing and smooth.
Follow these steps:
-
Cleanse: Gently wash your face to remove any dirt or makeup, ensuring a fresh canvas for your scrub.
-
Steam: If possible, steam your face for a few minutes to open up your pores, enhancing absorption.
-
Pat Dry: Use a soft towel to pat your skin dry, avoiding any harsh rubbing that might irritate.
These simple steps will help maximize the benefits of your homemade scrub!
Application Techniques
Once you’ve prepped your skin, applying your homemade scrub effectively can make all the difference. Start by scooping a small amount into your palms. Gently massage it onto your damp skin in circular motions, focusing on areas that need extra love. Rinse your hands frequently to avoid excess buildup. Use consistent pressure, but don’t scrub too hard; you want to exfoliate, not irritate.
| Step | Technique | Duration |
|---|---|---|
| Scoop | Use a small amount | N/A |
| Massage | Circular motions | 3-5 minutes |
| Rinse Hands | Keep hands clean | As needed |
| Focus Areas | Concentrate on rough spots | N/A |
| Pressure Control | Gentle, consistent pressure | Throughout |
Rinse and Moisturize
After you’ve finished massaging the scrub into your skin, rinsing it off properly is key to reaping the benefits.
Follow these steps to ensure your skin feels rejuvenated:
- Use lukewarm water: Hot water can strip natural oils, while cold water may not remove all the scrub.
- Gently pat dry: Avoid rubbing your skin harshly; instead, use a soft towel to absorb excess moisture.
- Apply moisturizer: Seal in hydration with your favorite lotion or oil immediately after drying to lock in that glowing softness.
With these tips, your skin will feel smooth, refreshed, and radiant!
How Often to Use the Scrub
How often should you indulge in a homemade scrub to reap its full benefits? Aim for once or twice a week, depending on your skin type.
If you have sensitive skin, stick to once a week to avoid irritation.
For normal or oily skin, you can enjoy the scrub twice weekly, allowing your skin to glow and feel smooth without over-exfoliating.
Remember to listen to your skin’s needs; if it feels tight or irritated, ease back on frequency. Additionally, be mindful of common face wash mistakes that may affect your skin’s balance and health.
Consistency is key, so make it a delightful part of your skincare routine for the best results!
Storing Your Homemade Scrub
To ensure your homemade scrub stays fresh and effective, proper storage is essential.
Here’s how to keep it at its best:
-
Choose Airtight Containers: Use glass or plastic jars with tight-fitting lids to prevent moisture and air from degrading your scrub.
-
Store in a Cool, Dark Place: Keep your scrub away from direct sunlight and heat, which can alter its ingredients and reduce potency.
-
Label and Date: Always label your container with the name and date you made it to track freshness; most scrubs last about two weeks. Incorporating natural ingredients, such as kitchen ingredients for added benefits can also enhance your scrub’s effectiveness.
Following these tips will help you enjoy glowing skin for longer!